MS-005 · Personal
3D-Printed Sliding Shelf
Overview
A self-directed print that solves an actual problem instead of demonstrating a technique. A tray that hooks over the side rail of a dorm bed and slides along it, with a cup holder built into it. I designed it in my first semester at UF and I still use it every night.
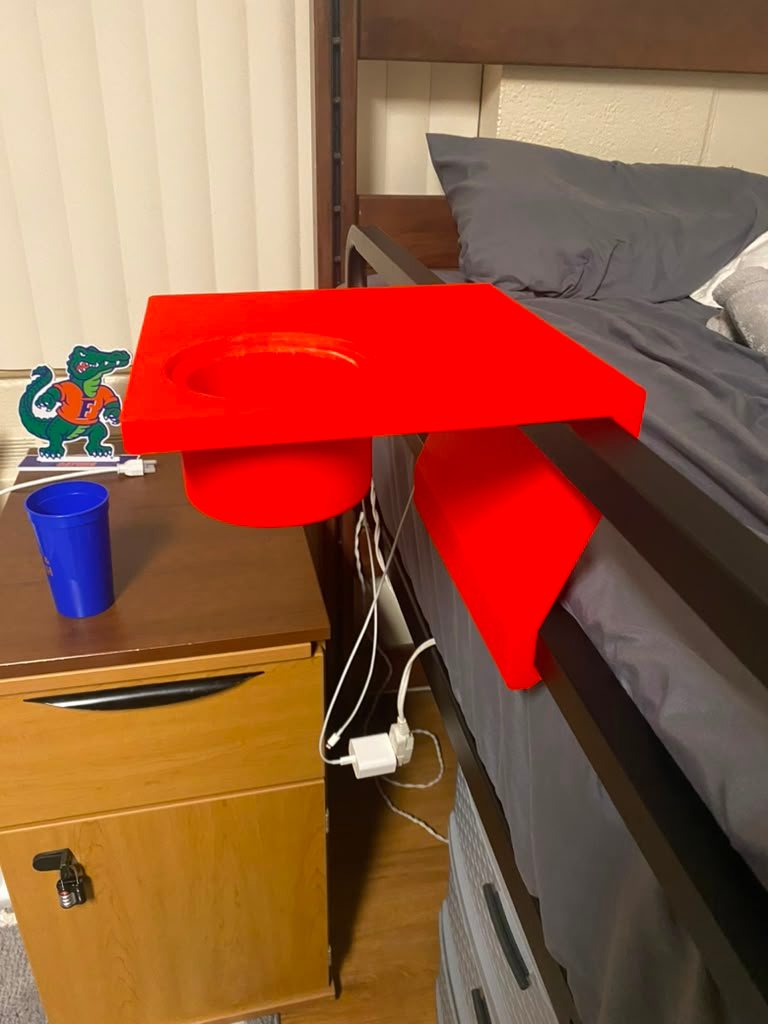 In use, next to the nightstand it replaced
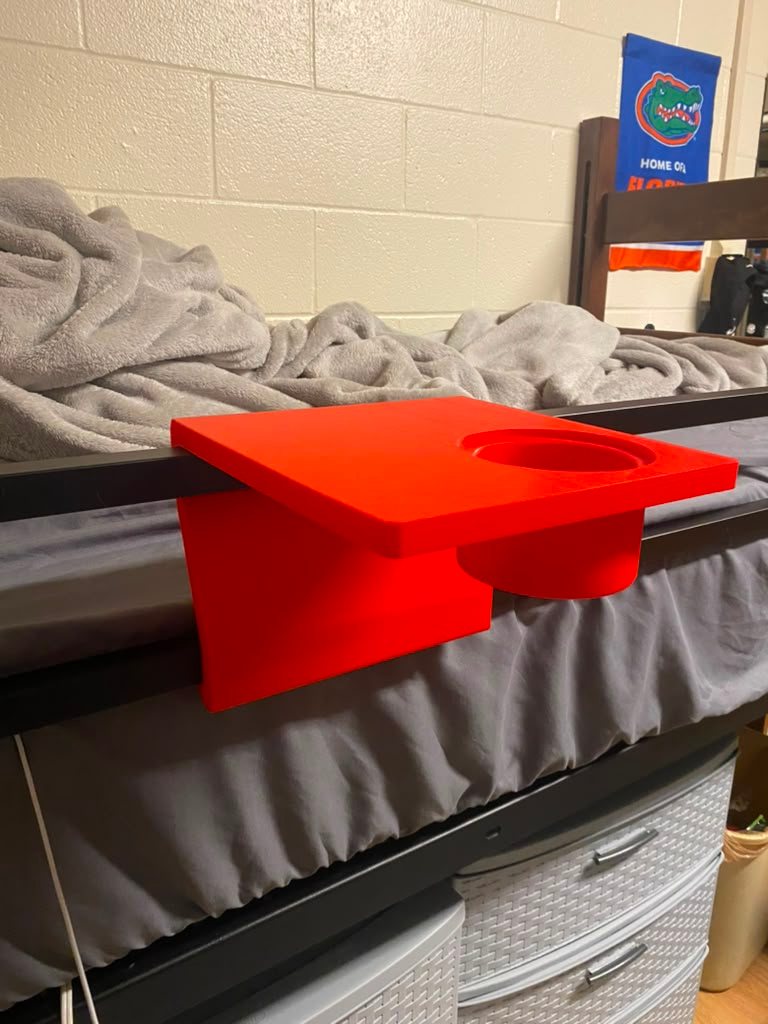 The hook and the cup holder
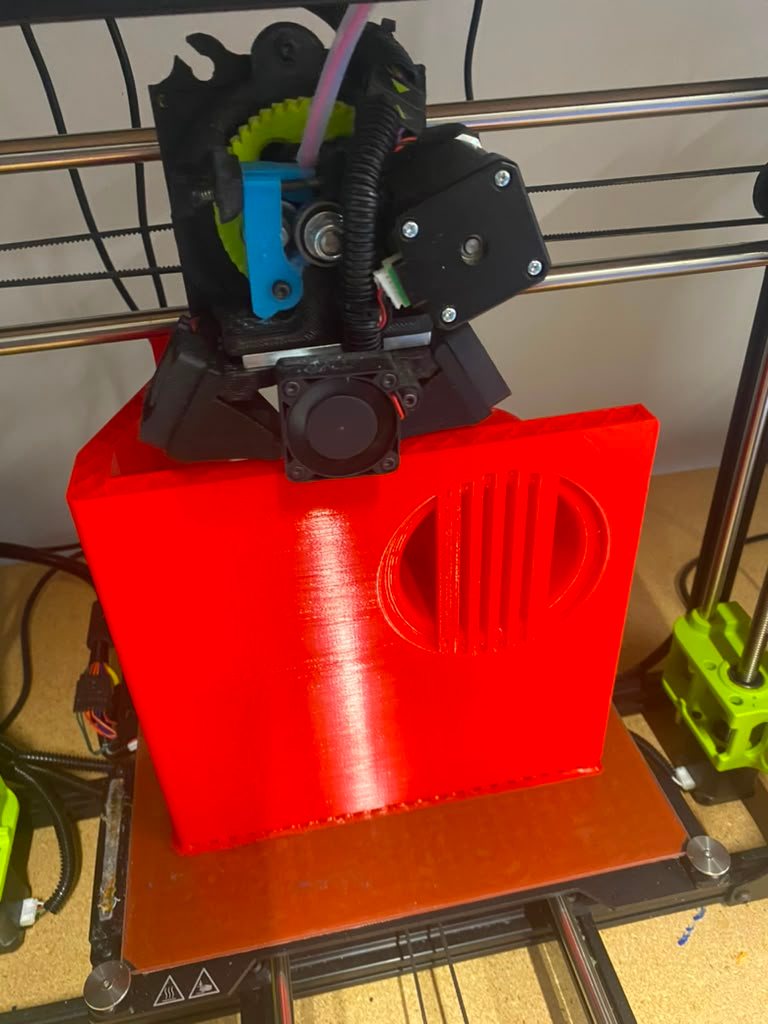 Printed on its side, mid build
 Off the bed, carried back across campus
How it was designed and built
One printed piece with no fasteners, sized around a rail I had to measure properly before anything fit. Several versions followed, some because the design needed changing and some because the print failed.
The problem
The nightstand that comes with a dorm room sits well below the mattress. Reaching down and over the rail for a phone or a drink in the dark is awkward, and anything you set down at that height you cannot see from the bed. The furniture is fixed and the bed frame is fixed, so the only thing left to change was to add something.
What I wanted was a surface at mattress height, right where my hand already goes, that did not need a single hole drilled in university furniture.
Design
It is one printed piece with no fasteners and no moving parts. The cross section is a C shape that drops over the bed's side rail. The tray sits on top of the rail, a web runs down the outside face, and a return foot tucks underneath so the whole thing hangs on its own weight and cannot tip off when something is set on the outboard edge.
Because nothing clamps it, it slides freely along the rail. I can push it up near the pillow to read or down toward the foot of the bed when it is in the way. That was the point of hanging it rather than fixing it.
A cup holder is sunk into the tray, with the well hanging through on the inboard side where there is free air below. Putting the deepest feature over empty space rather than over the rail meant the tray itself could stay thin.
Iterations
Several versions, and the reasons split evenly between the design and the printer.
The design changes were about size. Getting the C profile to match the rail is the whole part. Too tight and it will not go on. Too loose and it rocks every time you lean on it. That opening was what kept getting adjusted, and once it was right the fit was snug enough to stay put and loose enough to still slide.
The rest of the versions existed because prints failed. A part this size is a long print, and a failure four hours in is a wasted evening and a wasted spool. Losing a few taught me to check the first layer properly rather than starting it and walking away.
Worth saying plainly, since the interesting failures are the ones that did not happen. Nothing cracked and the hook never worked loose. No version broke under load, which for a cantilevered part in PLA was better than I expected.
Printing
PLA at 40% infill, which is heavy for a decorative print and about right for one that carries weight on an overhang all day.
The orientation is the part I would point at. It prints standing on its side, so the layers run parallel to the plane the load pulls in rather than across it. Printed flat, every layer line would be a crack waiting to open at the corner where the tray meets the web, which is exactly where the bending moment is highest. On its side that corner is continuous. It also means the cup holder's underside gets bridged rather than needing a support tower under it.
Sliding it along the rail
Outcome
It is still on the bed and still in use, which is the only test that really counts. Other people asked for one after seeing it, so I have printed more since.
The thing I took from it is that the hard part was never the modeling. It was measuring a rail properly and being willing to reprint when the fit was wrong, which is the same loop as any of the coursework projects on this site, just with nobody grading it.